Wilanów RotLite
Multimodal measurement head for imaging of 3D geometry, angular and spectral reflectance and color.

The multimodal measurement setup was developed in cooperation with the Museum of Jan III’s Palace at Wilanow, in the framework of the project “Revitalization and digitalization of Wilanow, the only Baroque royal residence in Poland”. The project was co-financed by the European Union within the European Regional Development Fund under the Infrastructure and Environment 2007 – 2013 Operational Programme.
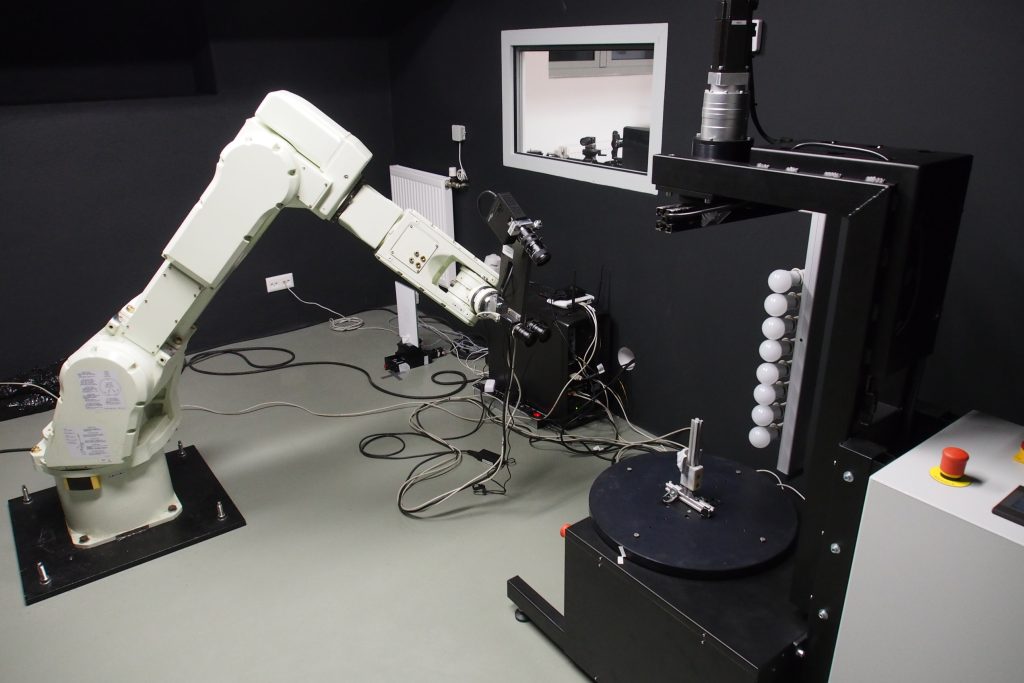
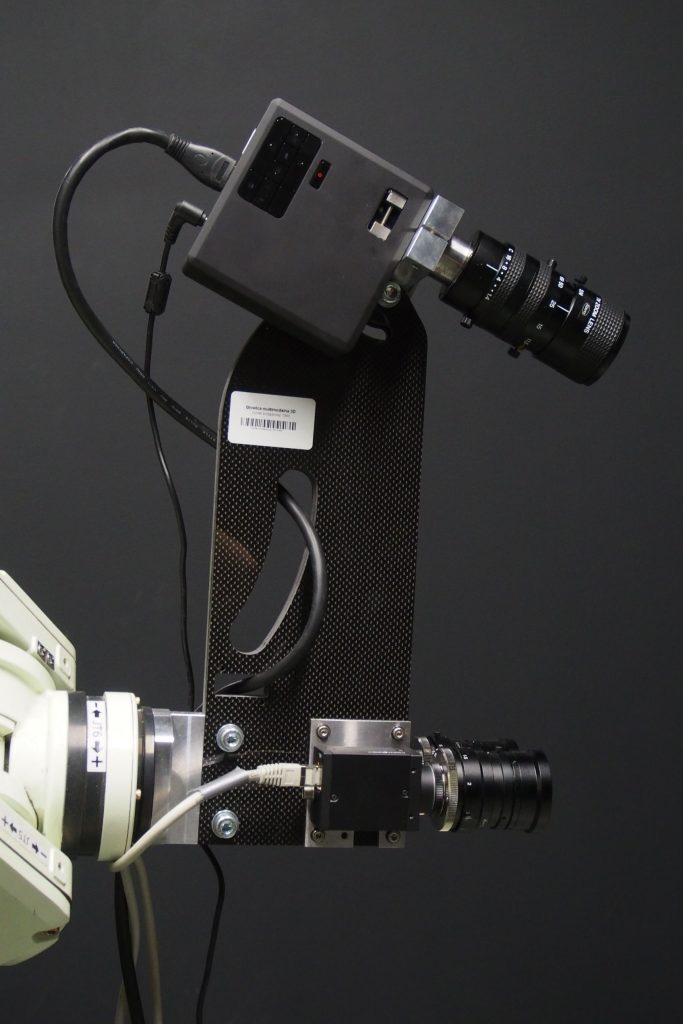
The setup consists of a 3D scanner head mounted on the arm of an industrial robot, a turntable on which a scanned item is placed, and a unit of mobile, spectrally tunable light sources. The whole device is controlled by a PC with dedicated software developed at the Virtual Reality Techniques Division, WUT.
The presented measuring station combines three measurement paths that register different physical properties of a three-dimensional surface. They are respectively the surface geometry, the spectral reflectance characteristic and angular reflectance characteristics, described in terms of a BRDF (Bi-Directional Reflectance Distribution Function) function.

The measurement of a 3D geometry uses a structured light projection method based on sine and binary fringes projection. The sequence of fringe patterns is recorded by a digital camera, and then used to determine the so-called point cloud which represents a three-dimensional shape of the imaged surface.
Measurement of the spectral reflectance is based on recording of a set of images in the 6 to 10 spectral channels in the visible range. The spectral filtering can be done by using tunable light source or filters in the optical path of the camera. The algorithm calculates the spectral reflectance at each pixel, independently of the light source characteristic. This information allows the determine the surface color perceived under any type of illumination. In addition, it is possible to calculate the quantitative difference between colors.
Finding the angular reflectance characteristic (BRDF) requires registration of images of the investigated surface, illuminated from different directions. The captured images allow to establish a mathematical model of the BRDF function. The model describes an amount of light energy dissipate in a given direction, based on the energy incident in a different direction. This way it is possible to estimate the appearance of the surface, whether it is shiny or matte.
The described solution uses the same camera to collect images needed as input data for all of the measurement paths. Therefore it allows to determine the spectral and angular reflectance characteristics of the surface at each point of the three-dimensional cloud.
The main application of the presented solution is digital documentation of cultural heritage objects. Because of a rich set of collected raw data, it is possible to obtain a variety of information about the measured object. They are important for art conservation and documentation, as well as for visualization in a virtual environment.
The collected data can be used for:
- identification of the materials from which the object is made by comparing the spectral reflectance of a sample to a reference spectral response of a pigment.
- monitoring the aging process by comparing the shape of the surface recorded at time intervals. For example, to assess deterioration a sculpture surface due to weathering conditions.
- determination of the authenticity of an artwork by comparing the surface micro-geometry of the sample with the previously made reference measurement of the original sample.
- simulation of the appearance of an object in viewing conditions different than the ones which normally occur at the exposition, including those that would be potentially dangerous for the artifact. For example, it is possible to simulate the look of an oil painting in daylight, while it is normally exposed to low intensity tungsten light, due to the risk of damage by ultraviolet radiation. In addition, information about the BRDF allows to visualize light reflections on the surface while changing the direction of illumination.
- a virtual reconstruction of the original appearance of a monument, even though it has been found in the incomplete state. Often it is not possible to modify the original object due to its historical value, but a reconstruction could be important for educational or cognitive purposes.
Additionally, if the object is mechanically damaged, the previously made 3D scan can be used to restore the original appearance.
- copying of the scanned object using 3D printing technology for the purpose of reconstruction, promotion or education.
Potential applications of the presented technology are wide, however they usually require developing a dedicated software for processing, analysis and visualization of the final data. In each individual case the processing path should be tailored to the specific solution to ensure the optimal and user-friendly result. The operations performed on the raw measurement data include:
- filtering, fitting the data geometrically and/or simplification of the 3D point cloud. Additionally, the data representation can be changed from raw points to a triangle mesh when needed.
- derivation of a color texture and/or spectral reflectance for a 3D model, based on the spectral calibration;
- finding the parameters of the BRDF model;
- calculation of statistical data and parameters which describe the investigated object for a specific application.
In a general case to display the final results of measurement a dedicated software must be used. It should be able to visualize a 3D model, along with information on color and illumination conditions simulated in the virtual scene. However, it is possible to export data into a format supported by commercial software, such as: 3D Studio Max, Blender, and also export to formats supported by 3D printing management solutions.
Parameters of the measurement setup:
| Parameter | Value |
| Max. dimensions of the scanned object (l/w/h) | 300 x 300 x 500 mm |
| Max. weight of the scanned object | 50kg |
| Resolution of the surface geometry measurement | 40 points/mm |
| Accuracy of the surface geometry measurement | 0.05mm |
| Range of the spectral reflectance measurement | 400 – 700nm |
| Resolution of the spectral reflectance measurement | 5nm |
| Accuracy of the spectral reflectance measurement | 5% of the range, in comparison with a reference spectrophotometer |
| Format of the color measurement result | CIE XYZ, CIE LAB, sRGB |
| Min. distance from the scanner to the object | 550mm |
| Volume of a single measurement | 60 x 80 x 40 mm |
| Duration of a single geometry measurement | 15s |
| Duration of a single reflectance measurement | 300s (on average – depends on the number of directions) |
| Total duration of the whole object measurement | 8 – 48h (depends on size and shape of the object) |

